Validator Key Gen: Device Setup
Validator nodes play a crucial role in the blockchain network, participating in the consensus mechanism to validate transactions and create new blocks. As such, the security of these validator nodes and their associated keys is of utmost importance. Generating your validator keys on a clean, offline device that has never touched the internet during setup is an ideal practice. Here's why:
- Mitigation of Cyber Threats: By generating validator keys on a clean, offline device, you reduce exposure to potential online threats, including malware, hacking, and other forms of cyberattacks. With no internet connection, the chances of a hacker accessing your keys are essentially zero.
- Control Over Key Generation: Generating keys offline ensures that you have complete control over the entire process. The private keys are not exposed to third-party services, minimizing the risk of unauthorized access or leakage. A clean operating system installation is an excellent variant to establish this security so that no other program or service can copy clipboards and store them somewhere until the network connection is restored.
- Elimination of Potential Spyware: A clean device implies a system free of any potential spyware, adware, or other malicious software that could compromise your keys. Eliminating the risk of spyware is crucial, as such threats could potentially record your keystrokes or screen, which could expose your private keys.
- Protection against Remote Attacks: An offline device is inherently immune to remote attacks. Hackers cannot penetrate a device that is not connected to a network.
- Enhanced Privacy: Offline generation of keys ensures that no traces of your keys are left online, providing maximum privacy.
Therefore, please ensure you have a machine that can be flashed or used as a key-generation device. In case you only have your node device, please do the generation on your node before you flash the system and continue with setting up the node's operating system.
Download and Preparation
I will use Ubuntu as it's the quickest and easiest setup for an offline machine using USB.
Download the latest official Ubuntu version from ubuntu.com/download/desktop. You need a USB device with at least 4GB that you can use to install the firmware on the storage disk. Ideally, the operating system is the latest LTS build, so there are no errors with dependencies that could not load for the generation software for the keys.
- Download Ubuntu 22.04.2 LTS
- Create a Bootable USB Drive with the ISO file
- Windows: Rufus Guide for Ubuntu
- Linux: Disk Creator Guide for Ubuntu
- MacOS: Etcher Guide for Ubuntu
- Disconnect the USB drive
- Connect the USB drive to your machine
An up-to-date system is essential to use the Deposit CLI tool.
System Installation
After getting the boot device ready, we can continue with the installation.
Make sure to never connect to the internet. Do not connect an Ethernet Cable.
Enter BIOS
Connect your machine to power and attach a keyboard and monitor.
- Connect your Bootbable USB device to the node
- Turn on the node using the power button
- Press
F2on your keyboard during boot to enter the BIOS setup
Change Boot Order
- Go to
Boot->Boot Priority - Set
Boot Option #1to your USB device - Set
Boot Option #2to your internal SSD
Operating System Startup
Now that we configured the BIOS correctly, we can exit and start up the node from the defined boot device.
- Press
F10to save changes and exit BIOS - Wait for the stick to boot up
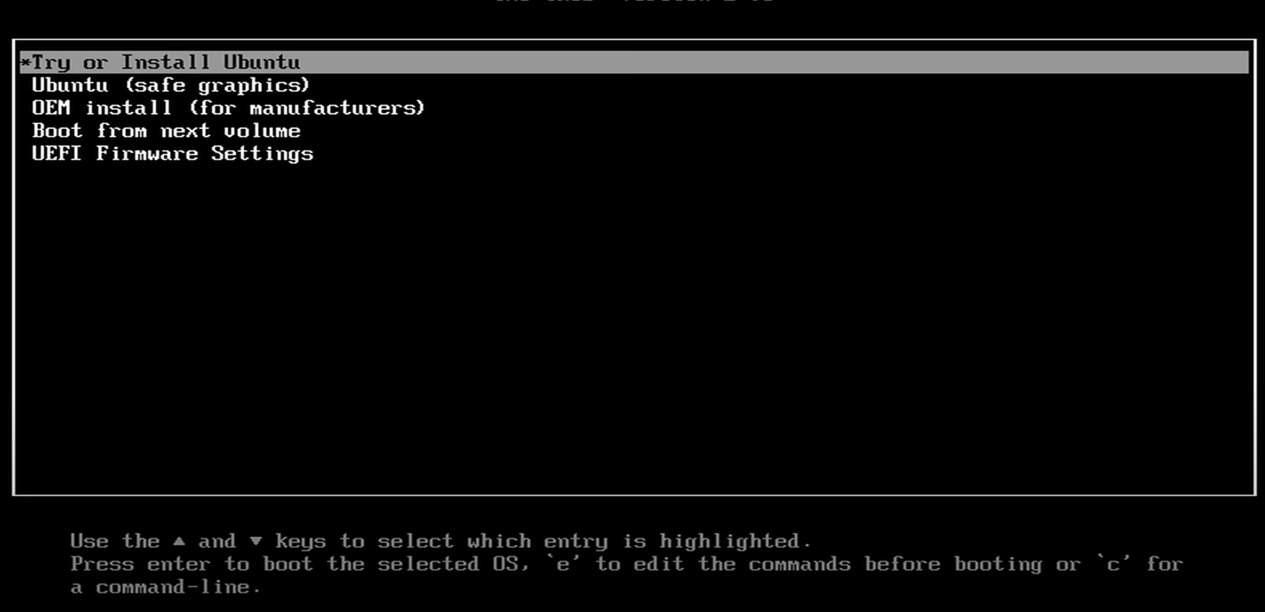
- Choose
Try or Install Ubuntu Server
Ubuntu Installation
You will be left with the following screen:
Afterward, the initial Ubuntu setup screen will come up.
Setup Process
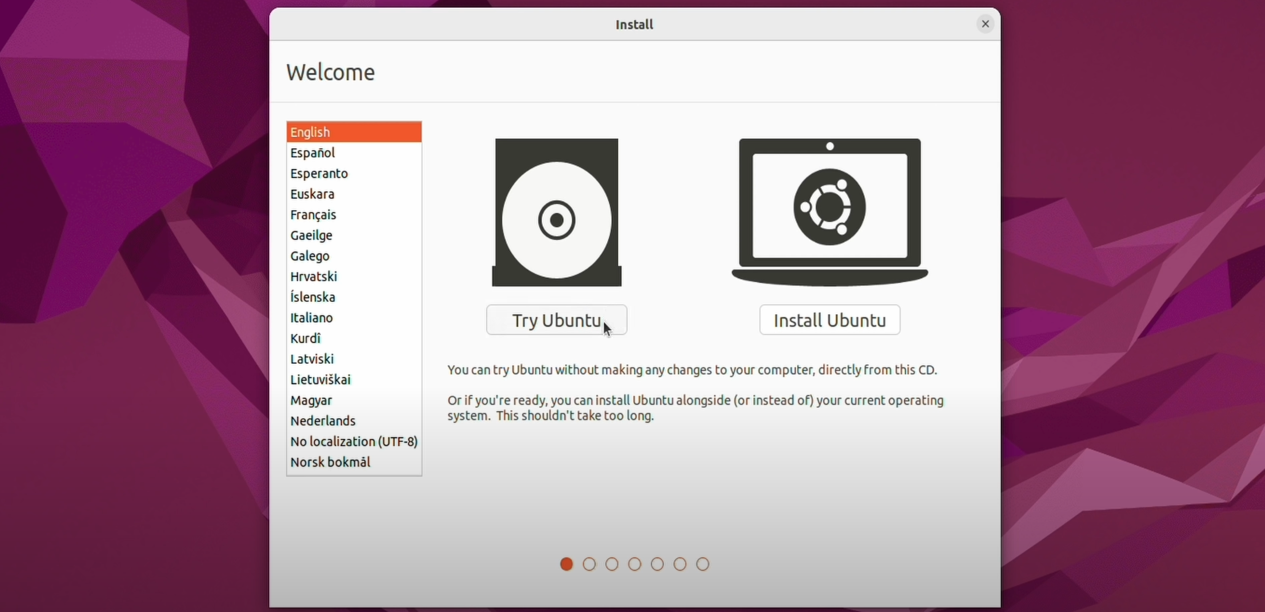
- System Language: Choose your operating system's language.
- Keyboard Configuration: Specify your keyboard layout and language.
- Updates and Software: Choose
Minimal Installationto reduce installation time and program scope, to reduce potential bugs or leaks. Remove the tick fromDownload updates while installing Ubuntuas it won't work on an offline device. Also, ensure there is no tick atInstall third-party software for graphics and Wi-Fi hardware and additional media formats. We don't need all those things as the system will never be used as a regular pc for this installation. As this device will be flashed right after, we do not need encryption. - Installation Type: Choose
Erase disk and install Ubuntu. The machine's storage will be formatted, erasing the previous data. When prompted with a pop-up, click onContinue. - Time Zones: Choose any timezone you like. It will be the default time configured on the clock.
- Login Data: Define a name, username, and password.
Finish the setup and remove the bootable USB stick when prompted.