Part 3 - Settings & Security
In part three, we will update various settings to improve security.
Step 1 - Configure SSH Server
In this step, the SSH server will be configured. The following keywords will be set:
ChallengeResponseAuthentication no- disables keyboard authenticationPasswordAuthentication no- disables password authenticationPermitRootLogin prohibit-password- disables password and keyboard-interactive authentication for rootPermitEmptyPasswords no- When password authentication is allowed, it specifies whether the server allows login to accounts with empty password strings. The default is no.
1.1 - open the configuration file:
Establish an SSH connection to your node machine and run the following command.
sudo nano /etc/ssh/sshd_config
1.2 - configure the settings
Copy the code block below and paste the keywords to the top of the file.
ChallengeResponseAuthentication no
PasswordAuthentication no
PermitRootLogin prohibit-password
PermitEmptyPasswords no
Challenge-response protocol in SSHv1 ChallengeResponseAuthentication has been upgraded to keyboard-interactive authentication protocol in SSHv2 which looks like the following:
KbdInteractiveAuthentication no
Save and exit
1.3 - validate SSH configuration
Check that the ssdh_config file is valid. If this command results in errors, go back to the last step and double check the changes you made.
sudo sshd -t
1.4 - restart ssh service
sudo systemctl restart sshd
Close the ssh session
exit
1.5 - test connection
Reconnect to your node machine to verify the settings have not caused any connectivity issues.
Step 2 - System Update
It is very important to keep your machine updated. In this step we will run a manual update and the configure the machine to automatically update.
2.1 - manually update the system
sudo apt-get update -y
sudo apt dist-upgrade -y
sudo apt-get autoremove
sudo apt-get autoclean
2.2 - configure auto-update
sudo apt-get install unattended-upgrades
sudo dpkg-reconfigure -plow unattended-upgrades
Step 3 - Disable Root Access
A root access should not be used. Instead, a user should be using sudo to perform privileged operations on a system.
sudo passwd -l root
Step 4 - Block Unauthorized Access
Install Fail2ban to block IP addresses that are attempting to access our node. Fail2ban blocks addresses after a certain number of failed attempts.
4.1 - install fail2ban
sudo apt-get install fail2ban -y
4.2 - configure fail2ban
Create a config file to monitor ssh logins
sudo nano /etc/fail2ban/jail.local
Paste the code below into the text editor. Replace <ssh-port> to match your ssh port number.
[sshd]
enabled=true
port=<ssh-port>
filter=sshd
logpath=/var/log/auth.log
maxretry=3
findtime=300
bantime=28800
ignoreip=
Save changes and close the editor
4.3 - start the service
sudo systemctl daemon-reload
sudo systemctl start fail2ban
sudo systemctl enable fail2ban
sudo systemctl status fail2ban
Step 5 - Improve SSH Connection (Skip if using Ubuntu Server)
This step is only required for Ubuntu Desktop installations. If you installed Ubuntu Server, you may skip this step.
WiFi power management may slow down SSH connections. Modifying the config file will disable it.
5.1 - open the configuration file
sudo nano /etc/NetworkManager/conf.d/default-wifi-powersave-on.conf
5.2 - modify power setting
Find the wifi.power setting and change to to match the following:
[connection]
wifi.powersave = 2
Save changes and close the editor.
5.3 - restart the service:
sudo systemctl restart NetworkManager
Step 6 - Resize Disk Volume (server install only)
This step is only required for Ubuntu Server installations. If you installed Ubuntu Desktop, you may skip this step.
The default install of Ubuntu Server does not allocate all of the free disk space to the volume group. Follow these steps to check your system and resize the volume group.
6.1 - check the volume group
sudo vgdisplay
Example Output 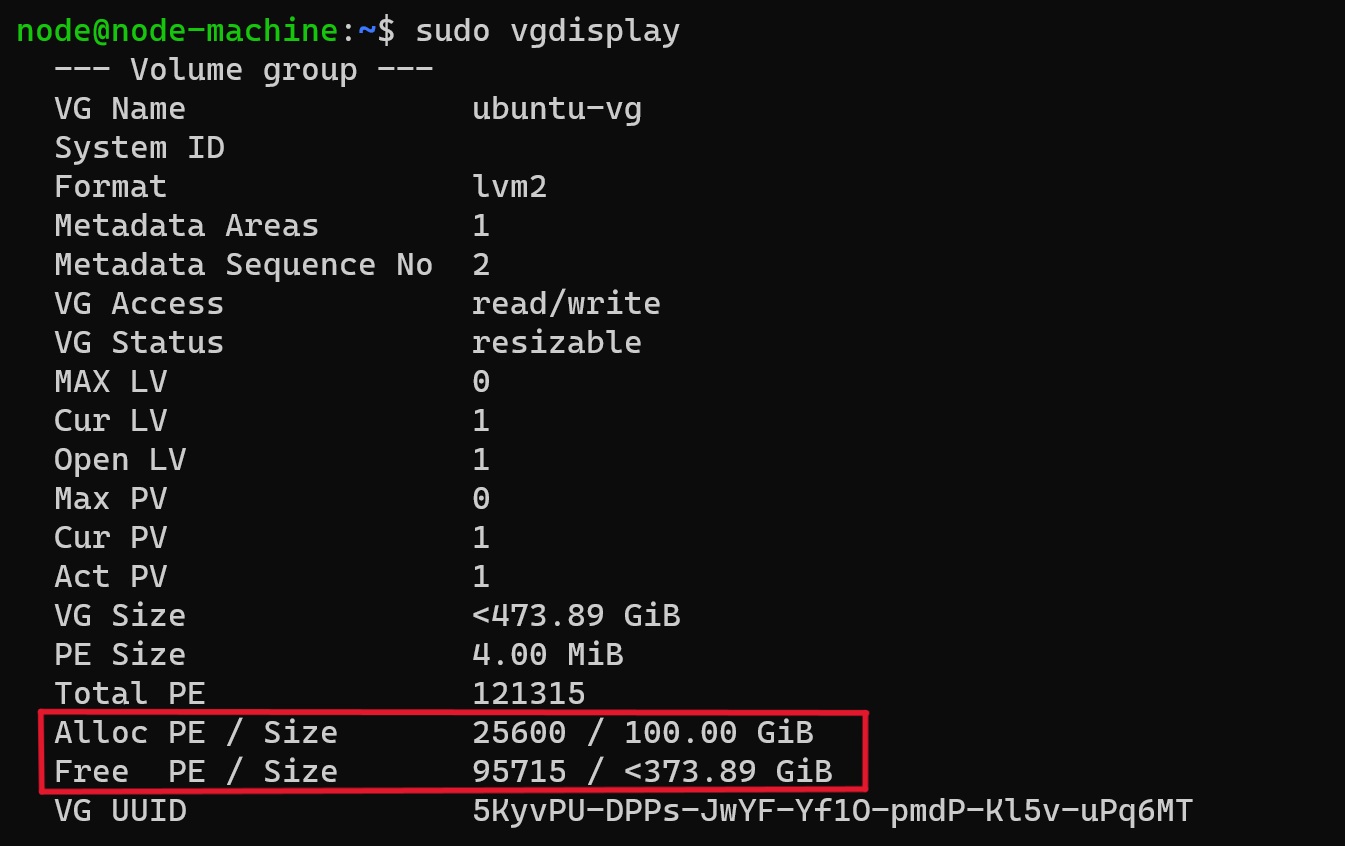 Check the output:
Alloc PE / Size shows how much space has been allocated to the volume
Free PE / Size shows how much space has not been allocated to the volume.
If Free PE / Size is zero, you can skip the rest of step 6
If Free PE / Size has a value, execute the commands below
6.2 - extend and resize the volume
Execute the two commands below
sudo lvextend -l +100%FREE /dev/ubuntu-vg/ubuntu-lv
sudo resize2fs /dev/mapper/ubuntu--vg-ubuntu--lv
Example Output 
6.3 - confirm the change
Check the volume group again
sudo vgdisplay
Free PE / Size should now be zero and Alloc PE / Size should be the full size of your disk
Example Output 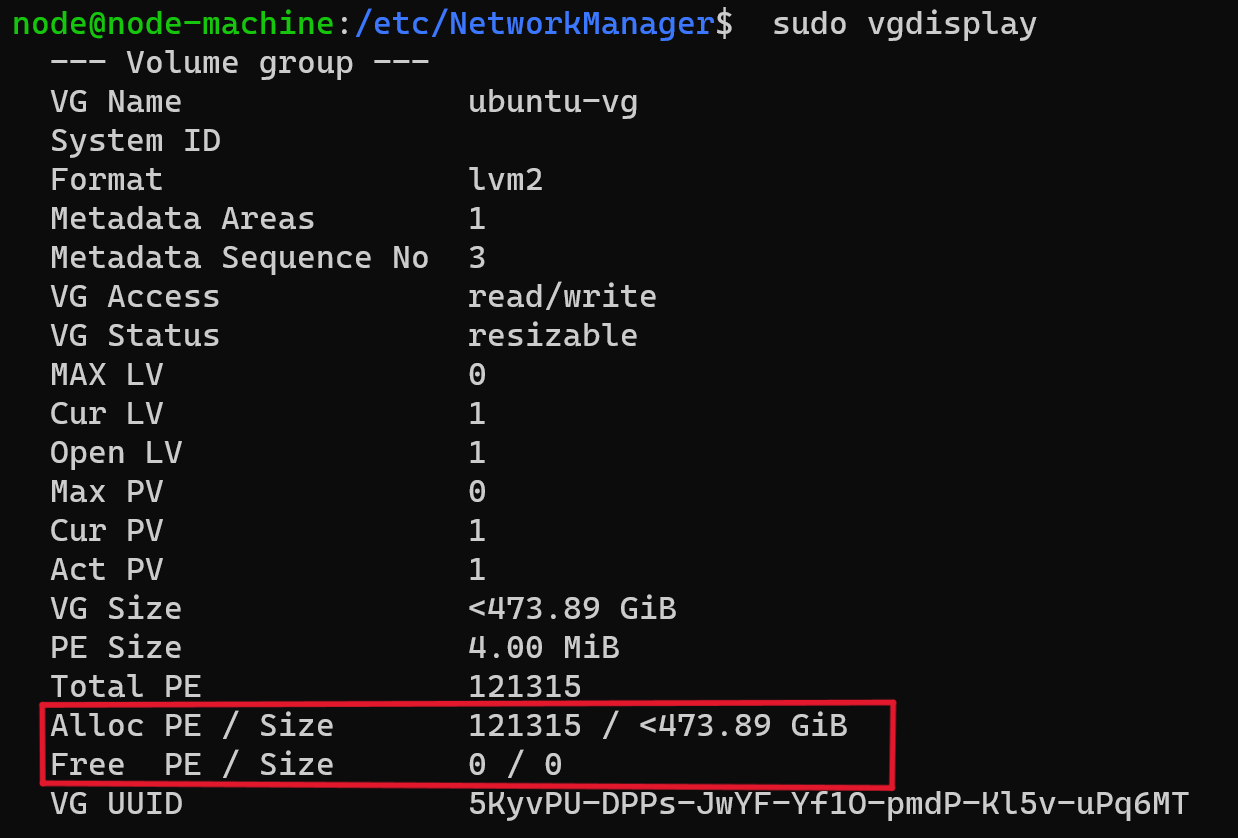
References